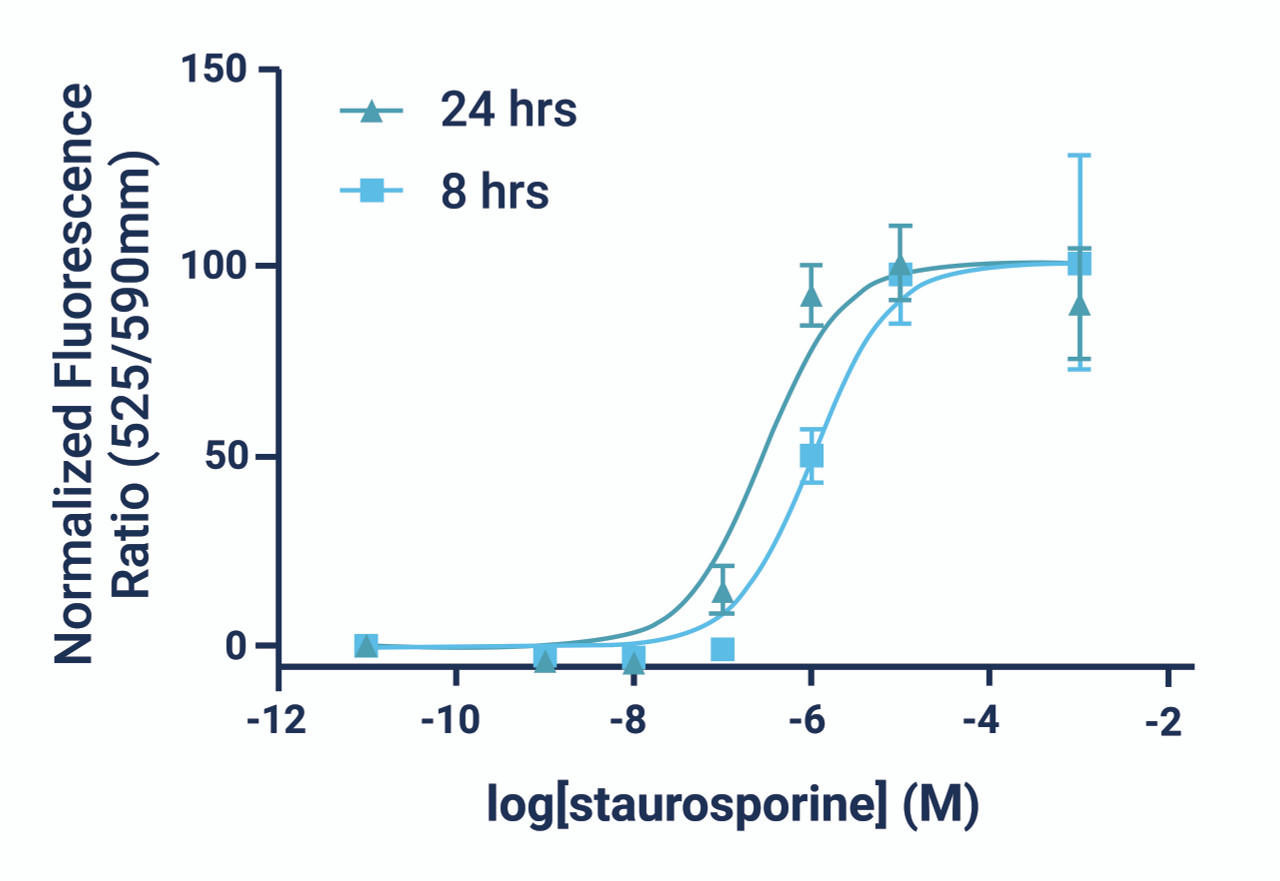
Description
GenieHTS JC-10 Mitochondrial Membrane Potential Assay Kit
Mitochondrial membrane potential assay kit that uses JC-10, a membrane potential sensitive dye that is more soluble than JC-1.
| Product Name: | GenieHTS JC-10 Mitochondrial Membrane Potential Assay Kit |
| Product Code: | ASIB009 |
| Product Size: | 5 plates |
| Excitation: | 490, 540nm |
| Emission: | 525, 590nm |
| Molecular Weight: | ~600g/mol |
| Solubility: | DMSO or H2O |
| Purity (minimum): | >98% |
| Component Name | Size | Storage |
| 100X JC-10 in DMSO (~3.5 mM) | 250 μL | -20°C |
| Dye Loading Buffer | 25 mL | -20°C |
| Masking Solution | 25 mL | -20°C |
Materials needed but not provided
- Compounds to be tested.
- Buffers and solvents for dissolution.
- Reagents necessary for cell culture.
- A fluorescence plate reader ~ 490 nm /~ 520 nM and measuring emission at ~525 nm and ~590 nm
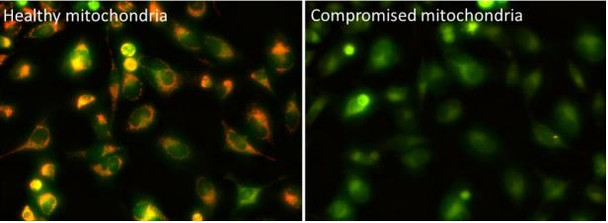
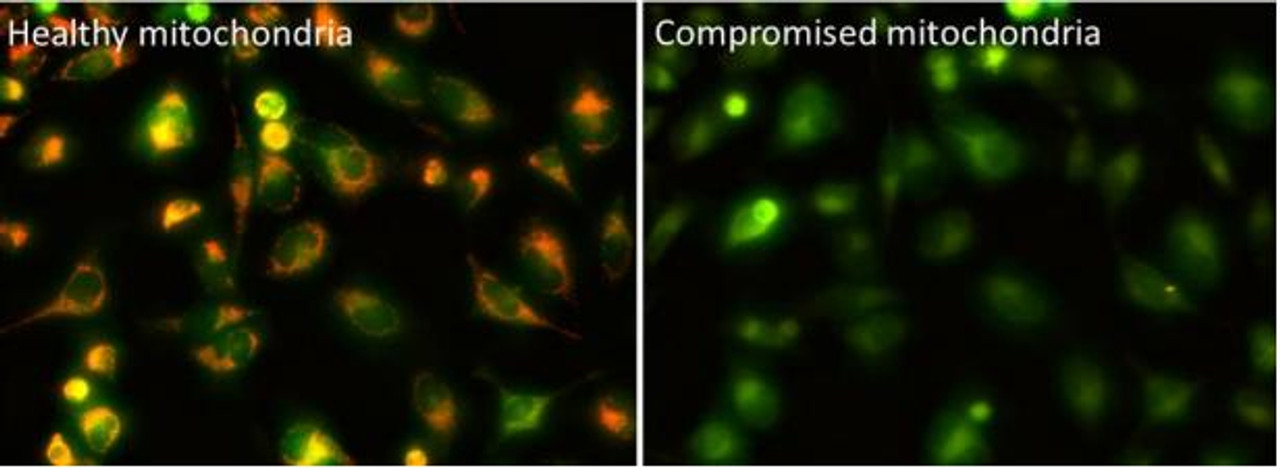
The Assay Genie JC-10 Mitochondrial Membrane Potential assay kit is the ideal solution for detecting changes in mitochondrial membrane potential due to cell apoptosis or other stress-inducing phenomena. The GenieHTS JC- 10 Mitochondrial Membrane Potential Assay is compatible with fluorescence microscopy, flow cytometry, and plate reader applications. JC-10 is a mitochondrial membrane potential probe. It possesses superior aqueous solubility compared to its better known analogue, JC-1. At low concentrations, JC-10 is monomeric and emits a green fluorescence. JC-10 accumulates in healthy mitochondria, forming J-aggregates that exhibit an orange fluorescence. Mitochondrial depolarization, a key marker of cellular apoptosis, results in a loss of JC-10 accumulation and a reversal to its monomeric form. This reversible behavior of JC-10 allows for ratiometric analysis of mitochondrial membrane potential, where a shift from orange (Ex/Em: 540nm/590nm) to green fluorescence (Ex/Em: 490nm/525nm) is indicative of compromised mitochondria.
The GenieHTS JC-10 Mitochondrial Membrane Potential Assay can be used to monitor and/or visualize mitochondrial membrane potential as a static endpoint or over time. When following our protocol, GenieHTS JC-10 Mitochondrial Membrane Potential Assay provides enough reagents to make 25 mL of working solution, enough for five 96-well plates or 500 flow cytometry samples. The actual number of assays will vary according to optimal dye concentrations and assay volumes for your application.
Assay Notes
- Optimal dye concentration and loading time will vary depending on cell type and application. Recommended dye loading concentrations range between 1 μM and 15 μM.
- The GenieHTS JC-10 Mitochondrial Membrane Potential Assay is compatible with kinetic imaging and analysis for up to 8 hrs after JC-10 addition under the appropriate experimental conditions.
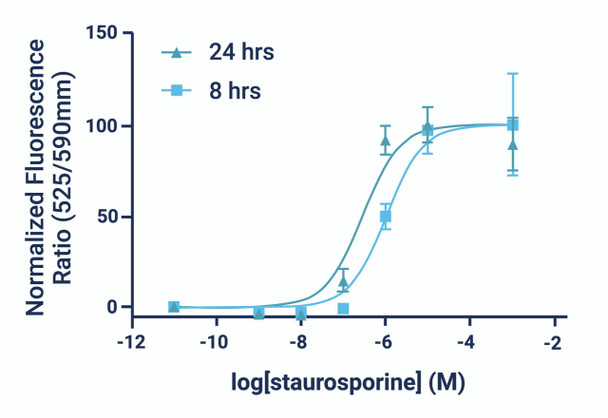
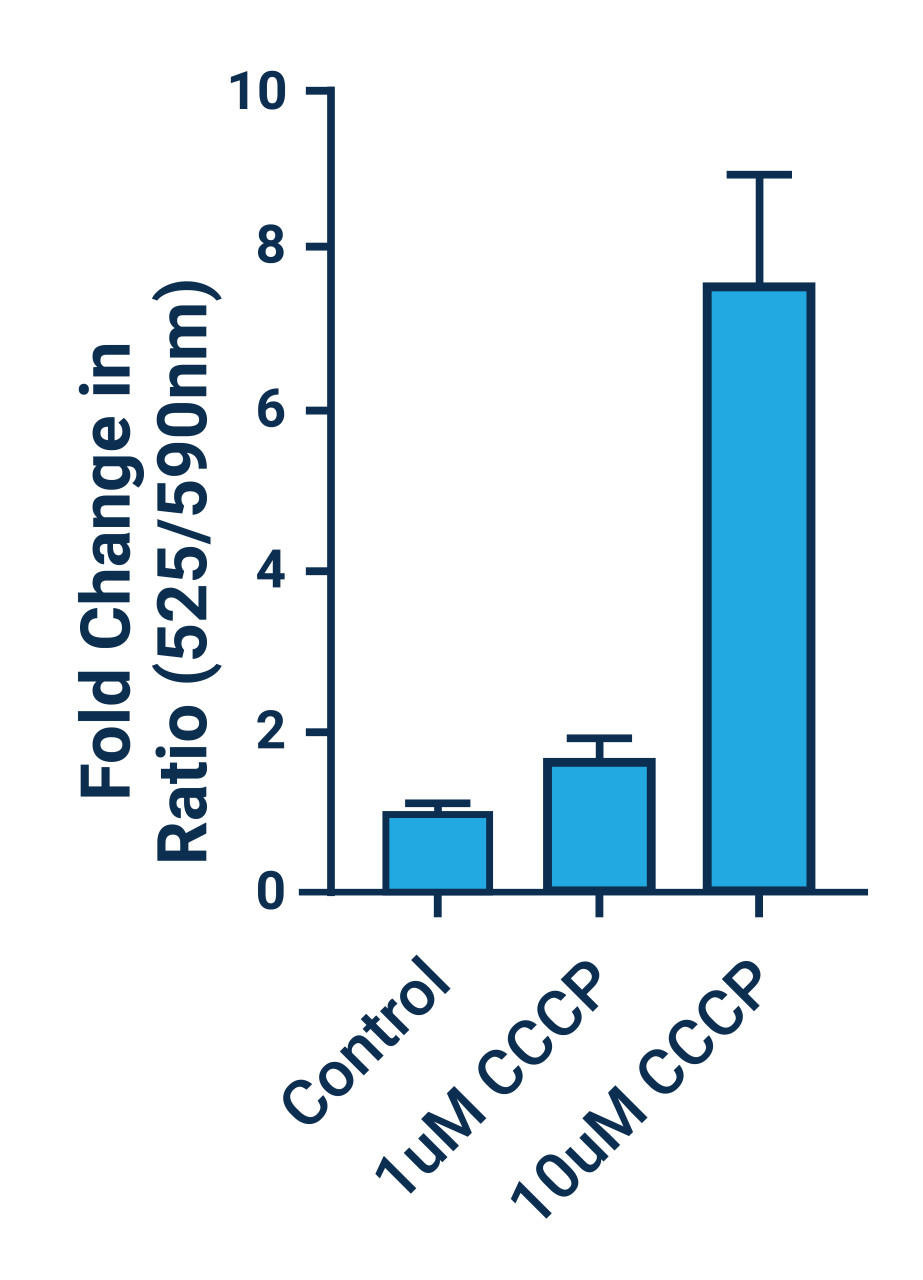
- There are a number of compounds that can be used as positive controls for our JC-10 Mitochondrial Membrane Potential Assay, including FCCP, CCCP, campothecin, and staurosporine. An effective FCCP and CCCP concentration is 2—5 μM for ~30 min prior to dye addition for most cell types. Campothecin and staurosporine require longer treatment times (3-6 hrs).
- Cytotoxic events that do not cause mitochondrial membrane depolarization are not detectable using this kit.
Assay Procedure
Plate Reader Assay
- Seed cells in a 96-well plate and treat with test compounds of your choosing prior to addition of dye loading solution (step 4). Target a final volume of 100 μL/well (80 μL of medium + 20 μL of 5X test compound). Removal of serum containing medium is not required. However, the user should take into consideration that the potency of some test compounds may be dramatically affected by the presence of serum. If the presence of serum is not desired, serum containing medium can be replaced by an equal volume of a buffered isotonic saline solution (e.g. HEPES-buffered Hank's balanced salt solution, not included).
- Remove all reagents from freezer and allow to warm to room temperature. Protect from direct light.
- Prepare dye loading solution by adding 50 μL of JC-10 stock solution to 5 mL of Dye Loading Buffer. Vortex briefly to mix. Solution should transition from pink to near-colorless when homogenously dissolved.
- Add dye loading solution prepared in step 3 directly to cells. We recommend 50 μL/well for a 96-well plate.
- Incubate cells for 30 - 60 min at 37 °C. Protect from direct light.
- Add masking solution directly to wells containing cells and dye loading solution. We recommend 50 μL/well for a 96- well plate; however, the volume of masking solution added should be optimized for your application. Do not remove dye loading solution from wells.
- Measure fluorescence using a microplate reader for ratiometric analysis. To quantify JC-10 monomer fluorescence, use Ex/Em ~490 nm/525 nm or instrument settings appropriate for fluorescein. To quantify JC-10 aggregate fluorescence, use Ex/Em ~540 nm/590 nm or Texas Red® instrument settings.
*Note: Kinetic monitoring of fluorescence ratios can continue for up to 8 hours after dye addition. We recommend read intervals >5 minutes to prevent photobleaching caused by overexposure to the excitation source.
Microscopy Assay
*Note: It is possible to load JC-10 dye prior to the addition of test compounds for real-time visualization of apoptosis. However, the following protocol assumes cells have been treated with test compounds prior to Step 1.
- Remove all reagents from freezer and allow to warm to room temperature. Protect from direct light.
- Prepare dye loading solution by adding 50 μL of JC-10 stock solution to 5 mL of Dye Loading Buffer. Vortex briefly to mix. Solution should transition from pink to near-colorless when homogenously dissolved.
- Add dye loading solution prepared in step 2 directly to cells. Volume needed will vary depending on well size. We recommend a dilution of 1 part working solution to 2 parts medium. For example, add 50 μL of dye loading solution to a well containing 100 μL of medium.
- Incubate cells for 30 - 60 min at 37 °C. Protect from light.
- Add masking buffer directly to cells. Volume needed will vary depending on well size. We recommend a dilution of 1 part masking buffer to 3 parts volume in well. For example, add 50 μL of masking buffer to a well containing a total volume of 150 μL. Do not remove dye loading solution from wells.
- Image cells using a fluorescence microscope. JC-10 monomers can be visualized with standard FITC or GFP filters, and JC-10 aggregate fluorescence can be viewed using Texas Red® or Propidium Iodide filters. An optional imaging setup to capture the monomer and aggregate fluorescence simultaneously uses an excitation filter ~490 nm paired with a long pass emission filter > 530 nm.
*Note: Time-lapse imaging of cells can continue for up to 8 hours after dye addition. We recommend imaging intervals >5 minutes to minimize photobleaching.
Flow Cytometry Assay
- Remove all reagents from freezer and allow to warm to room temperature. Protect from light.
- Prepare dye loading solution by adding 50 μL of JC-10 stock solution to 5 mL of Dye Loading Buffer. Vortex briefly to mix. Solution should transition from pink to near-colorless when homogenously dissolved.
- Collect and suspend cells exposed to test reagents in 100 μL of Hank’s balanced salt solution, or equivalent buffer, at 1-5 x 10⁵ cells/tube.
- Add dye loading solution prepared in step 2 directly to tubes. We recommend adding 50 μL/tube.
- Incubate cells for 15 - 30 min at room temperature or 37°C. Protect from direct light.
- Analyze cells using a flow cytometer. To detect cells with healthy mitochondria, use phycoerythrin (PE) settings. To detect cells with compromised mitochondria, use FITC settings. Use positive controls (e.g. FCCP-treated cells) to perform compensation corrections.

